Stereo system
For my dorm room
Work in progress
I have always enjoyed listening to music but every stereo system I have ever used seems to lack obvious features. A while back I received a large set of reel-to-reel tapes with a couple of recorders from my late grandfather's brother. It was then I decided I would build my own system to connect this to all my other audio equipment. Having a huge set of requirements this might well be my largest project yet.
Unlike the rest of the projects presented here, this one isn't finished yet. It's also the only one I'm not doing to help someone else, this is just for me. I decided to write about it anyway because I use it every day, I have spent a lot of time working on it and I'm still improving it on a regular basis. A lot is already finished and I have clear plans for the rest of the features.
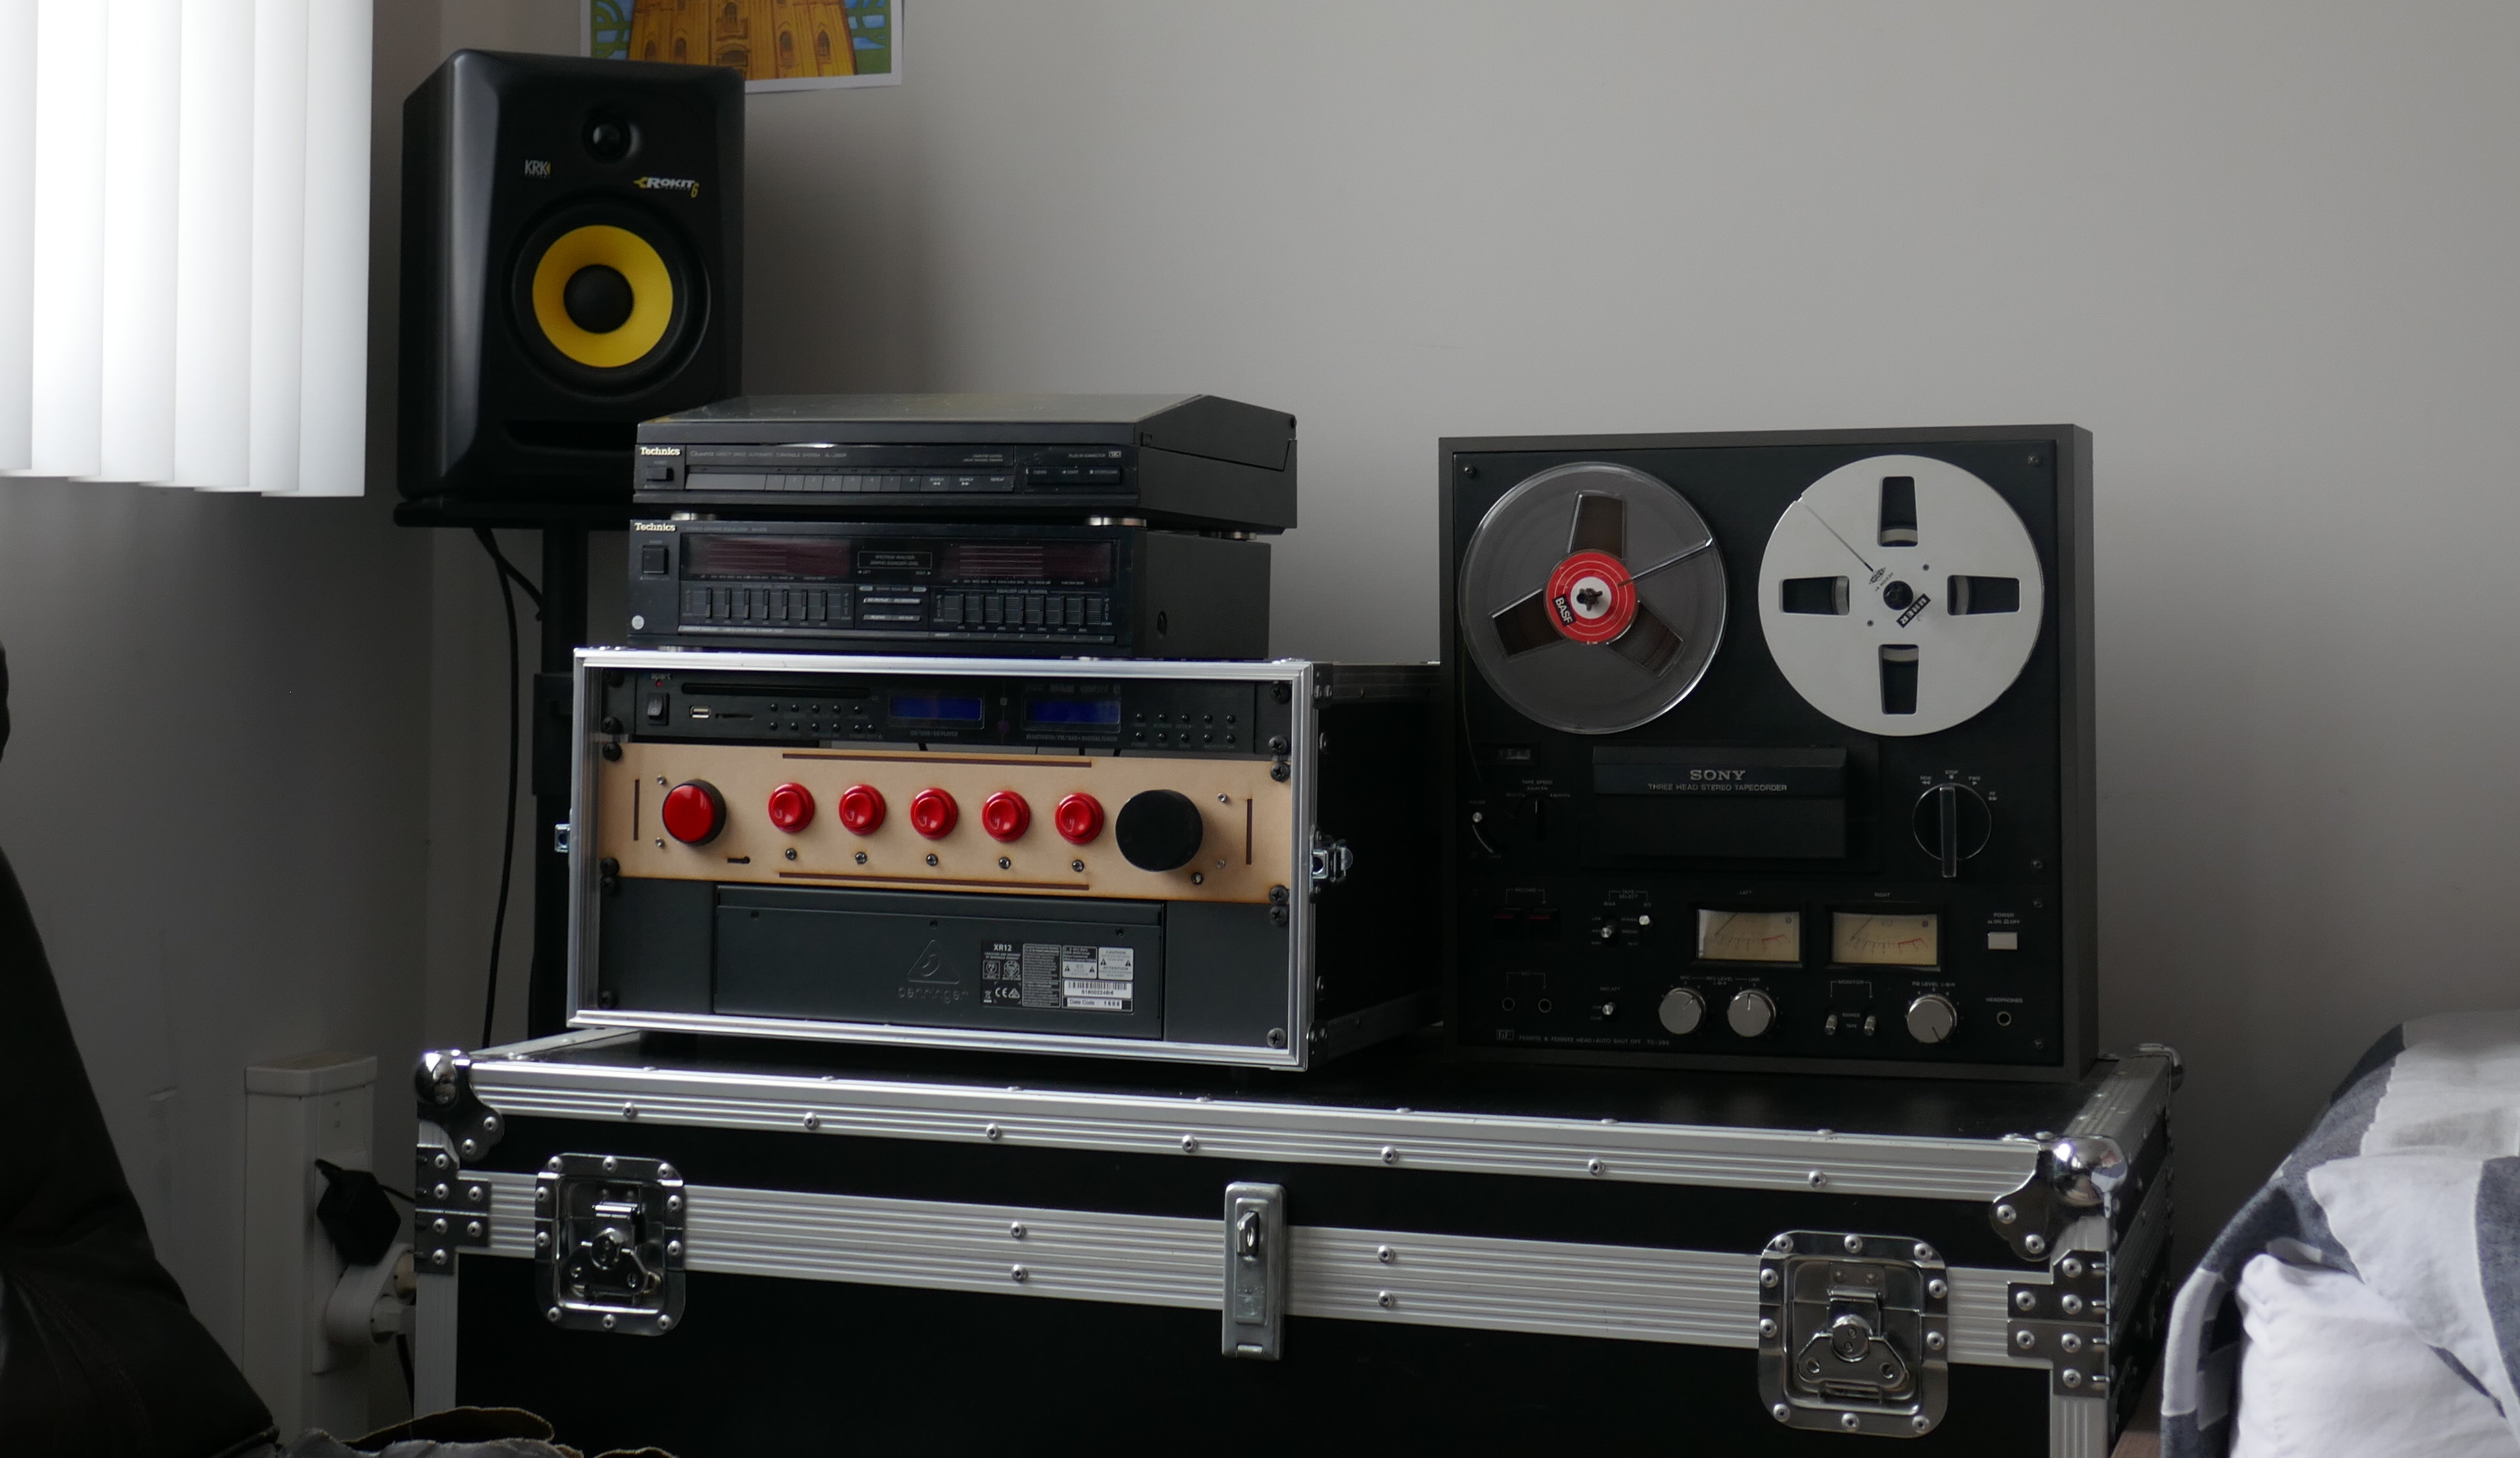
The idea of making a stereo system myself started when I moved into my dorm. The first thing I saved up for was a video projector. When turning my room into a movie theater an old stacked stereo system of my parents became my home cinema system. Apart from the video projector, it had a radio, cd player, cassette tape deck and a record player connected to it.
It seems like such an obvious flaw but I have never seen a stereo system that remembers its volume settings for each device individually. When switching between a lot of devices of different brands and ages the level always seems off. It's these kinds of details I have always wanted to change. With the addition of the reel-to-reel recorder, which also left my amplifier one input short, I knew it was time to finally tackle this challenge.
In a stacked stereo system, you often have a lot of high-quality devices working separately. The goal of this project is to connect them all together so they function as a whole again. To achieve this I figured I need a central system that connects everything together. If this is connected to the internet the whole stereo system can be controlled from a single phone app. This also removes the need to have a million different remote controls lying around. The system has to remember my volume settings for each device individually and there should also be a single master level which can be easily changed. Last but not least, I like to wake up with music. Preferably a random song from my collection. This should be controlled by the app in such a way that it will start the stereo system when I'm home but will use my phone speaker when I'm away.
A small shopping list
After a couple of tests of analog audio mixing with digital control, it soon became clear the actual mixing would best be done digitally. Creating a digital mixing desk is a daunting task I would really like to get into one day. But since I wanted this to be finished as quickly as possible and I would probably not succeed in making a decent mixing desk for the same price as a commercial one I decided not to DIY this piece. The Beringer XR-12 I bought already has a lot of the features I was looking for. Actually, it is a digital mixing desk for PA applications. It does not have any faders but has a lot of connectivity features like Ethernet, WiFi, and MIDI. The app that comes with it can control each channel's level, preamp, equalizer and a huge array of effects. But most importantly, it has a very well documented communication protocol. This makes it easy to control it from any internet-connected microcontroller.
I decided to upgrade my radio and cd player too. Since the Beringer XR-12 has a 19" form factor I decided to mount everything in a rack. The Apart PCR3000RMKIII is one of the few radios I found with an RS-232 serial port. Just like the XR-12 all of its features are documented and can be controlled remotely. Next to the radio and cd player, it also plays USB sticks and sd-cards. It also connects to Bluetooth devices, just like a portable speaker.
I don't think I would have found a connected reel-to-reel recorder, not in my budget anyway. The same goes for the cassette tape deck and record player. I decided I would just control the power of these devices, just like I planned to do for the active speakers I am using. I'm not inclined to work with mains power if I can avoid it. A nice trick I once heard of is to use remote controlled power plugs and hack into the battery powered remote control. This way all the mains power switching is done by a dedicated system complying with all safety standards. One of the decisions I came to regret was to buy a cheap set in a local store, but more on that later.
With all these devices connected together, I had a working stereo system most people would envy at sight. For me, however, the project was only just begun.
The hardware
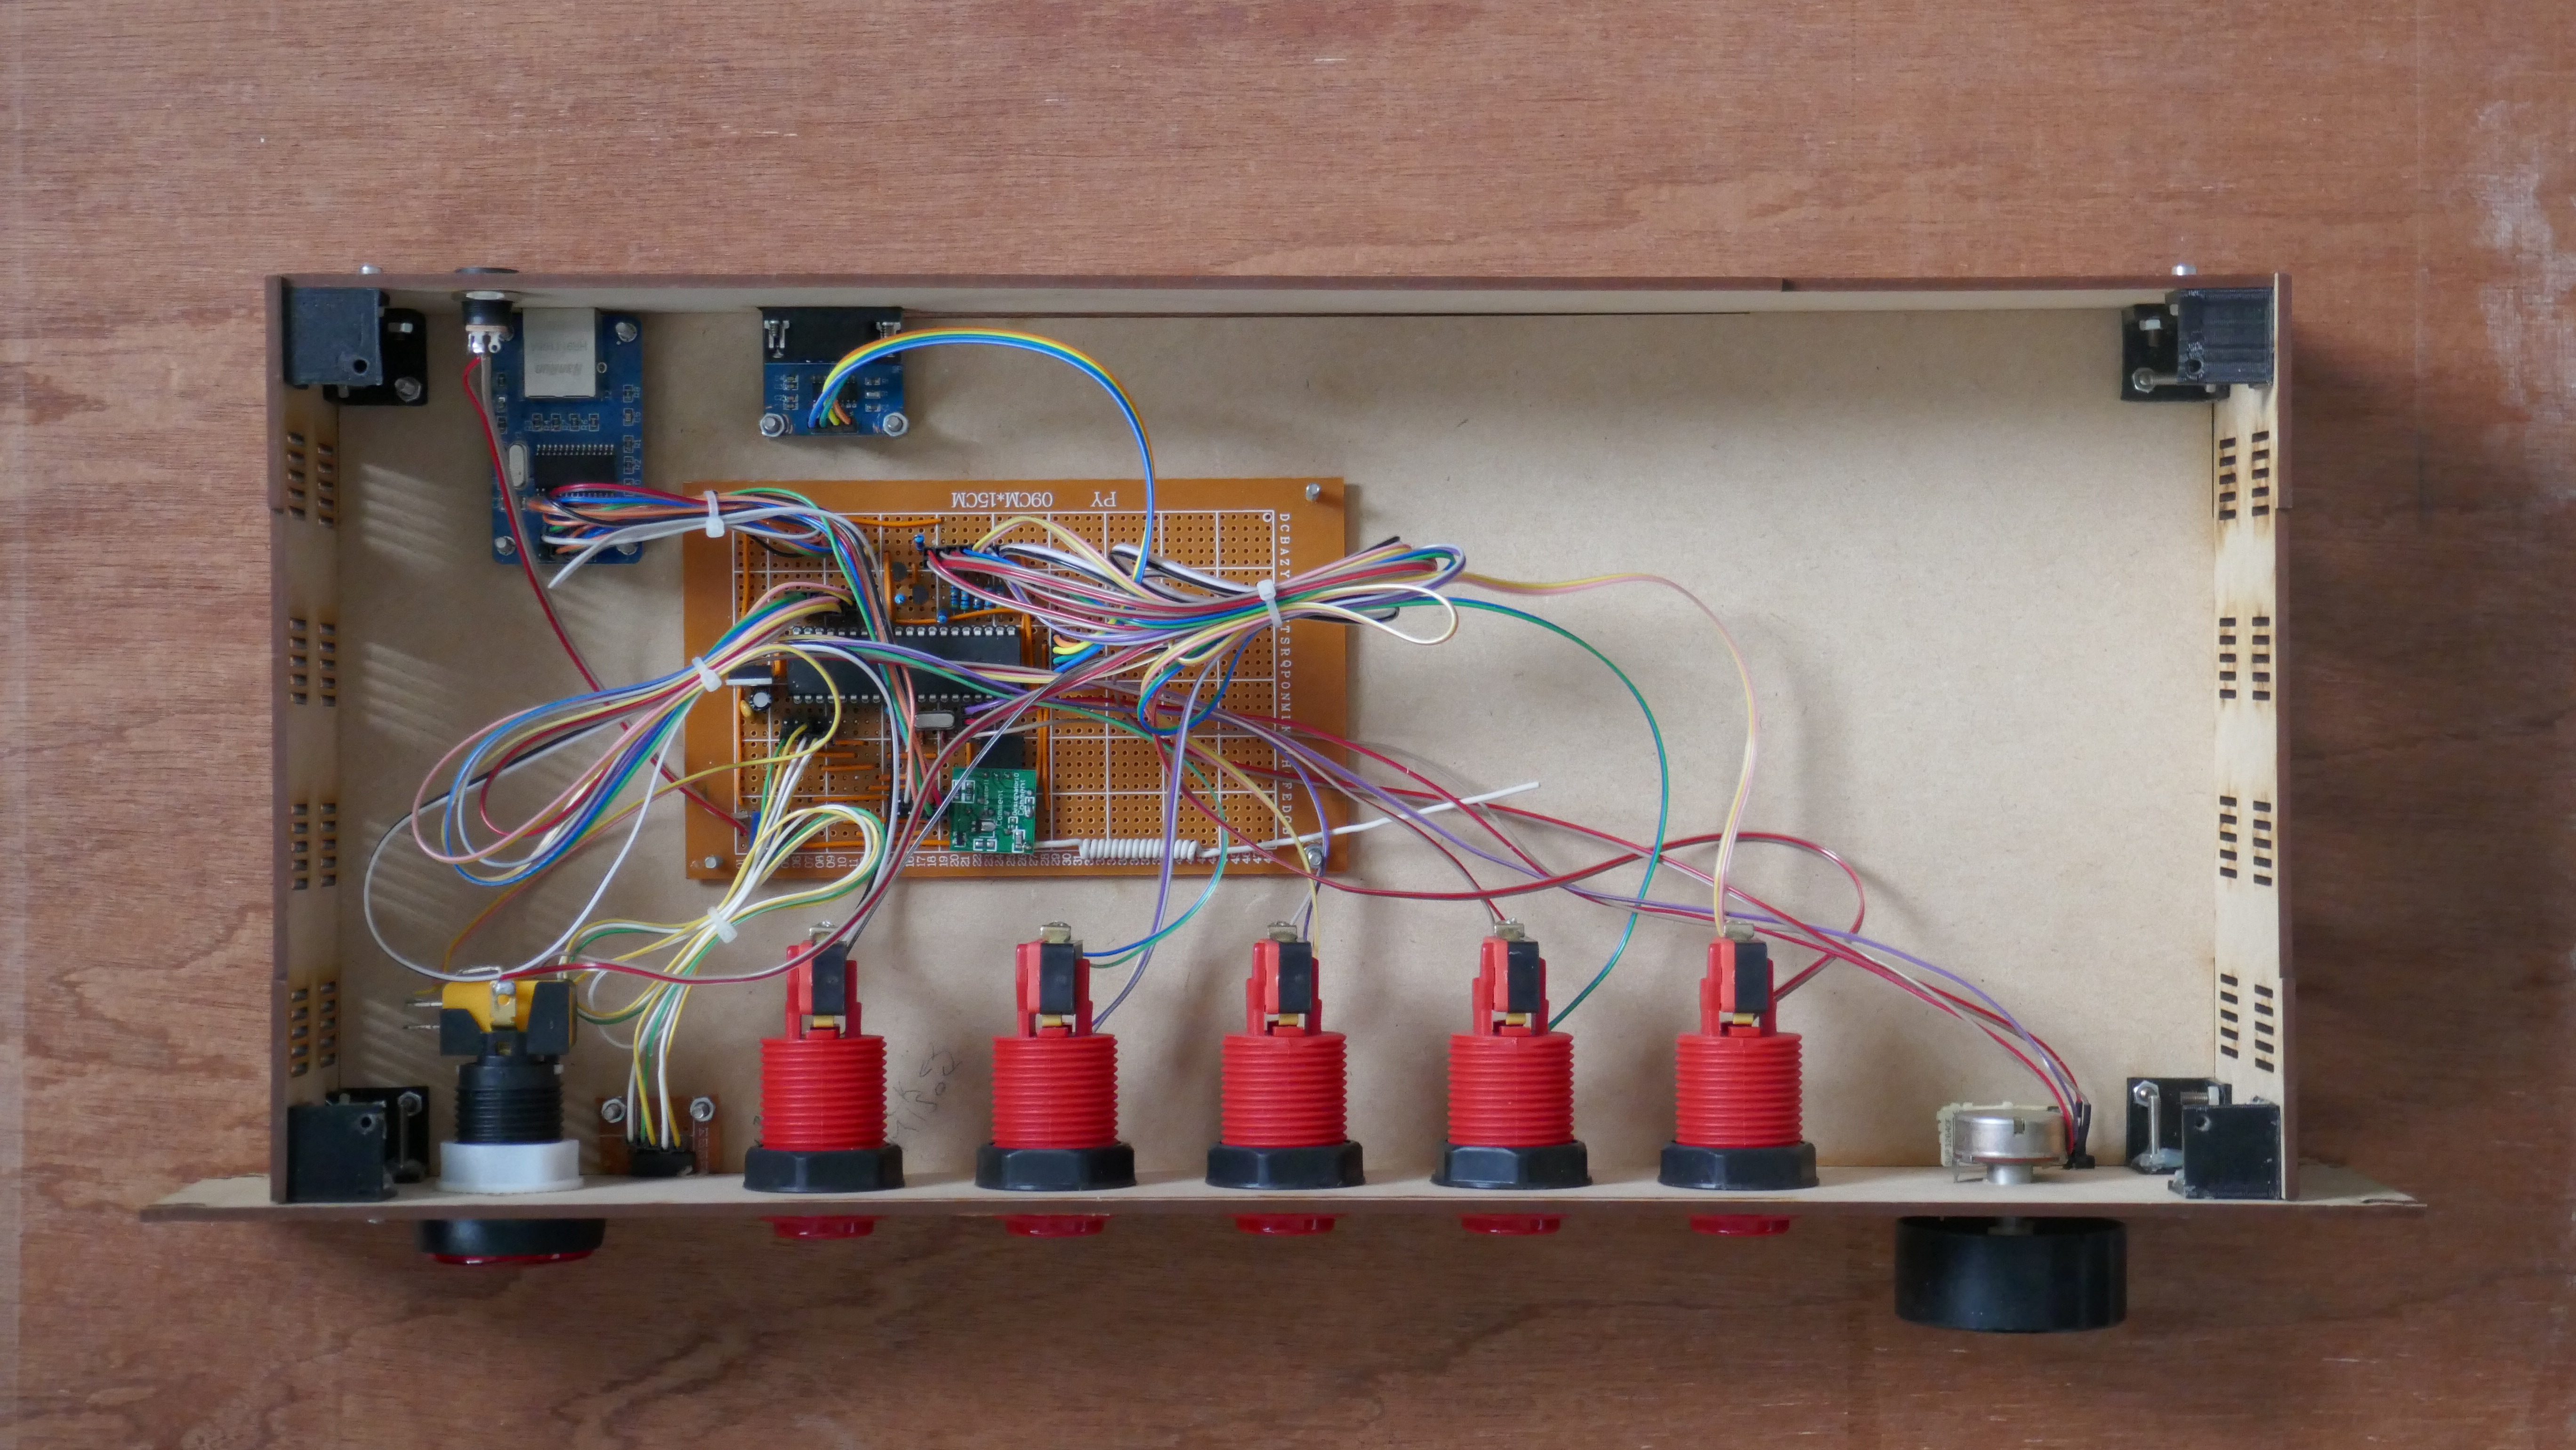
The finished electronics. Click to see how it fits in the case.
An Ethernet connection for the mixing desk, an RS-232 connection for the radio, an IR led for activating the video projector and a 433MHz transmitter for the RC sockets all need to be controlled by a single microcontroller. Since I already spent a lot of money on this project I wanted to continue with parts I had lying around as much as possible. From a previous project, I had a couple of spare ATmega1284 MCU's. For a simple 8 bit MCU, this IC has a whopping 16KB of ram, that's twice as much as the Arduino Mega! When looking at the software later on you'll see why I need it. Furthermore, it is through-hole and it connects easily to the perforated board I used to make all connections. For the ethernet connection, I used a breakout board for the ENC28J60 from Microchip since I have used these with the Arduino software platform before. For RS-232 I had some MAX3232 breakout boards on a dusty shelf. An infrared led with a transistor and a resistor where all I really needed for activating the video projector. The only thing that really was challenging was hacking the 433MHz remote control.
The buttons on the remote are organized in a matrix. I soldered some wires on the connector pads but faking the signals was a lot more difficult than expected. The next thing I tried was shorting the switches with MOSFETS. But this didn't work out well either with the components I had available. I finally decided to buy some cheap 433MHz transmitters from eBay. The next step was to reverse engineer the protocol of the RC sockets. This was a lot more complex than I expected. Luckily the exact model of sockets was quite popular in the Netherlands. I found a GitHub repository of someone who had already done all the hard work.
I hooked it all up on perforated board. Since the XR-12 has no physical controls I also added an encoder for the volume knob, a large power button, some LEDs and buttons to select the active device. I first designed the layout of the perforated board in Eagle. This worked wonderfully once I had the grid size setup right. With a nice printout of how the traces should run soldering up de perforated board was quick and painless.
I put everything in a nice wooden case I laser-cut in the local FabLab. The case I made to fit the same 19" rack the radio and mixing desk were placed in already. When all my software is done I'll make a new one out of dark acrylic without the hole for the ICSP connector in the front.
The software
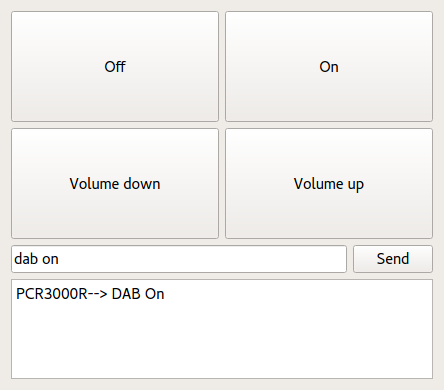
Screenshot of the controller application. Here it runs on Linux, it looks the same on Android.
A smart system needs some smart software. As said before, this project is still a work in progress. I'm pretty happy with the current state of the hardware but on the software side, I'm far from done.
Let's start with a short rundown of the important choices that have been made so far. I wanted to work with existing components as much as possible. Since the MCU is in the ATmega series the Arduino software platform proved to be the most extensive set of libraries available. With its easy serial communication RS-232 is a no-brainer. The software for working with the RC sockets was also written for Arduino but since I wanted to structure my software a bit differently I ended up rewriting most of it. For IR LEDs there are a lot Arduino libraries available. I haven't done this yet but I'm not worried about it. Ethernet was a bit of a challenge because the ENC28J60 is not supported out of the box. I had to make a few adjustments to the Webduino framework to make it play nice with this ethernet controller. But tweaking a couple of header files was all it really took. Because of all these libraries, I was able to stay clear of writing a lot of low-level code.
The Arduino libraries are written in c++. Even though it isn't the best language for an 8-bit micro controller it works quite well in this case. Most code isn't all that time critical so I'm even using a couple of virtual functions at some places. Working in an object oriented language really helps to manage the complexity of the software. Every subsystem is an object on its own. They all have an update method and these are all called in an infinite loop. This way a simple cooperative multitasking system is created. Because of this, the update methods should be nonblocking of course. All in all the main loop still runs fast enough to do some crude software pulse width modulation on the LEDs when adjusting the volume (all hardware PWM pins were already in use).
What's implemented already is powering on and off the system. This is timed in such a way that the speakers are activated after the mixing desk as to avoid any pops. The other thing that works is adjusting the master volume. When changing the volume, the LEDs display the current level as a progress bar. Even when changing the level in the XR-12 app the LEDs display the right level. After a second they return to their normal state which is to display which devices are active. Since activating and deactivating devices isn't implemented yet the LEDs currently just switch off. Powering things on and off and changing the volume can be done with the button and knob on the control panel. There is also a REST API implemented to control this over the internet. I also have a simple android app that is able to send these API calls.
The first thing I want to add now is to select the active device with the rest of the buttons on the controller. Next, I will make the individual volumes of the devices adjustable with the controller. For this, you'll have to keep the select button of the device pressed while turning the knob. Both of these should be pretty easy to implement on top of the current framework. The next thing I want to focus on is to get the power consumption of the system down when powered down. This might be a bit more complex because the REST API has to be online all the time. To finish the firmware all I would still need is an API for the RS-323 and the IR led. I'm planning to make this as simple as possible and put most complexity in the phone app to simplify updates.
For the phone app I have no concrete plans yet. I know what I expect from it and I do have some Android experience but a decent alarm clock that always works is probably a project on its own.